Before work starts: estimate, scope and permit
1. The on-site estimate
An accurate installation starts with an accurate look at the roof. We measure every roof plane and note each valley, skylight, chimney, vent and wall junction, because those details take most of the labor. Where we can get into the attic, we look at the underside of the deck for staining or rot that will need repair.
2. Scope, panel and color
You get a written scope that says what comes off, what goes on, and how flashings and penetrations will be handled. Then come the choices: panel width, seam height and finish color. In Los Angeles, the color can be limited by cool roof rules, so we check that before anything is ordered.
3. The permit
A re-roof needs a permit. Inside the City of Los Angeles that means LADBS. Other cities and unincorporated county areas have their own departments. Many re-roof permits are straightforward, but approval time varies with the department and the season, and it is often what sets the start date.
In the shop: forming the panels
4. Panel forming
Standing seam panels are formed from flat coil into long pans with raised edges. We do this in our own Van Nuys shop, cutting each panel to the exact length of its roof plane. Full-length panels mean no horizontal laps, which are a common source of leaks on long runs.
On the roof: what happens each day
5. Site prep
Before the first shingle comes off, the crew protects plantings, windows and walls, and places a dumpster where the old roof can drop straight into it. Expect a truck and a dumpster in the driveway for the length of the job.
6. Tear-off and deck repair
This is the noisiest day. The old roof comes off down to the sheathing, which lets us see the deck itself. Soft, cracked or delaminated boards are replaced. We tell you what we found before the new layers go down. If an overlay is allowed and makes sense on your house, this step changes; our guide to metal roof over existing roof vs tear-off explains how.
7. Underlayment and flashing
A high-temperature underlayment rated for metal goes down over the deck, so the house is dried in once this stage is done. Then the edge metal and flashing go in: drip edge, valley metal, wall and chimney flashing, and the boots or curbs around vents and skylights.
8. Panels and trim
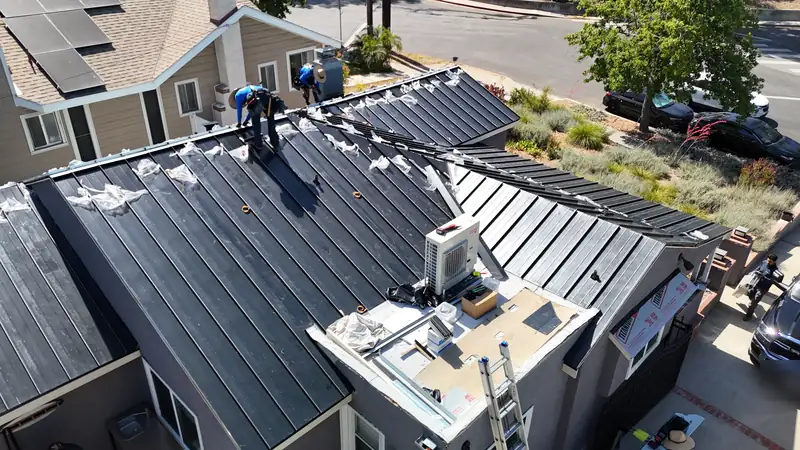
Panels are lifted onto the roof and fastened with hidden clips, and each seam is locked to the next. Panels usually arrive with a thin protective film, which is peeled off as each area is finished. Ridge, hip and rake trim close the roof off.
9. Cleanup, walkthrough and final inspection
The crew clears debris and runs a magnetic sweeper over the yard and driveway to pick up nails. We walk the finished roof with you, and the building inspector does the final inspection on the permit.